Always wear a helmet.
I always do, even though my Campagnolo cycling cap looks much cooler. Some of my best bike buddies never wear helmets. But then, I also have two friends whose lives were saved by wearing helmets. Another bike buddy would always say before the rides he'd lead: "Wear your helmet, but don't use it!"
If you have enough bike shops to choose from, find a shop where they are knowledgeable and comfortable about fixed-gear bikes. If you are not a mechanic, then have a mechanic check your bike out and sign off on it before you start.
Make sure that the rear hub has been made as back-pedal-safe as possible. On a fixed-gear hub, a strong steel lockring is a must.
Make sure that your chain is strong, because your chain is essential to both your drive-train and your ability to stop. There are strong track chains by Izumi and HKK, and strong BMX chains by KMC. Your chain isn't the place to skimp on dollars or save weight!
Choose a safe place to practice these techniques! Places like parks or empty parking lots are great. When in doubt, follow the roller-bladers and skateboarders who wear the baggy pants. They know the best spots.
Look farther down the road than you would with a freewheel bike. Especially when riding brakeless, your stopping distance is longer. Use peripheral vision and train your mind to be receptive to what's out to the sides, up to 180-200 degrees. You'll also be able to develop a sense for what's behind you, guided partly by sound, partly by intuition.
Warm up and stretch before your rides, and before trying any of the techniques, especially if they require new muscle movements. This is to maximize your skill as well as to help prevent injury. I have had injuries merely from not being flexible enough. Stretching yields greater flexibility, and warming up makes it easier to stretch.
EquipmentStart with a bike whose frame fits you well, not too large and not too small. It's best if it has rearward-facing horizontal dropouts--'track ends'. You find track ends on track bikes, singlespeed mountain bikes, and on 'street-fixed' bikes. Street-fixeds have become common over the last couple of years. They are affordable fixed-gear bikes that look like track racers, but have a heavier and more relaxed frame and drillings for a front and perhaps a rear brake. As of this writing (June 2002), street-fixed bikes are being made by Surly, Bianchi, KHS, Gunnar, Urban Cycles and Fuji, although not all of these are appropriate for offroad use.
To enable you to back-pedal hard without loosening the cog, you'll need a proper fixed-gear hub with a steel lockring.
You'll probably change your setup once you gain some basic skills. But the following suggestions should shorten your ramp-up time.
Clips and straps, not clipless pedalsThese allow you to use the backs of the pedals for balancing drills while you're learning. I use double straps.
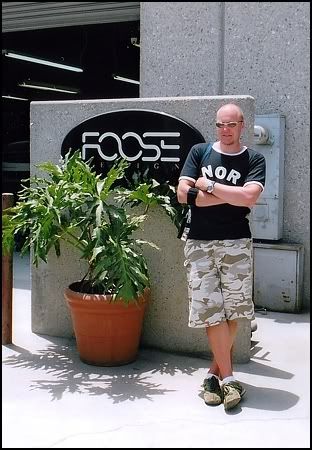
Shoes with flat rubber soles and no cleatsWhile you're learning, it's good if you can quickly slide into the clips and back out without sticking. I have found soccer shoes and skateboarding shoes ideal for this purpose. Don't use running or basketball shoes, as the sole is too knobby for quick entry and exit. They may also be too bulky to fit smoothly into the toeclips.
Front brakeA back brake is optional, a front brake is mandatory--not just for safety, but also because it is required by law in most countries. If you live in an area where legislation allows you to ride brakeless, then the first step is a front-brake-only setup. I myself wanted to go brakeless, but I was cautious. I kept the front brake on for an entire year while I learned. Then I took it off and never used it again.
Low gearChoose a gear that's low enough to get you up the hills, but not so low that you lose control on the way down. Gearing is a personal matter, of course, but something in the high 60s or low 70s is usually considered a good choice to learn with. Here are some likely chainring/cog combinations on a 700c bike, with the resulting gear expressed in inches. 26" wheelers should check the sidebar for further pointers.
48x19 = 68.2"
48x18 = 72.0"
46x18 = 69.0"
46x17 = 73.1"
44x17 = 69.9"
44x16 = 74.3"
Riding the Undersides of the PedalsDismounting and trackstands are easier to learn if you are not clipped in. You will fall less. It helps if you can ride the undersides of the pedals, leaving the clips facing the ground. The clips might scrape the ground if your bottom bracket is low and your cranks are long. On a true track bike, this won't be an issue--these bikes are built to keep your pedals off the ground. If your clips do scrape while approaching the ground, try bending them into a flatter position.
The Handlebar MountOf course you can mount a fixed any way you like. But most people riding fixed don't use the traditional mount, where you swing the leg up and back over the saddle. Instead, they use the much cooler handlebar mount. They sweep their leg in a quick movement up in front, over the handlebars and back down to the pedal on the opposite side. This method is faster and smoother than the traditional mounting method. It evolved on track bikes, where the bars are a good deal lower than the saddle--and there are no brake cables to foul you up!
The entire mount takes about a half a second. The steps take much more time to read and grok! I've assumed mounting from the left (L) of the bike. If you mount from the right (R), then just switch the Ls and Rs.
It's good to practice rocking the bike. This is not absolutely necessary, so you can skip the next section if you wish. But if you get it down, rocking will help make your mounts and dismounts much smoother and faster.
Rocking The Bike
Rocking is a side-to-side motion that makes your mounts and dismounts smoother and more fluid. To rock the bike, stand to the L side of the bike. Orient your body so that your R hip is square on to the bike (or at a 45 degree angle). Hold the L handlebar in your L hand, and the stem in your R hand. Let your L hand go. With your R hand on the stem as a guide, let the bike fall about 10 or 15 degrees away from you, towards the bike's R. Now, with your R hand, gently throw the bike back towards your L hand, which will catch the bike's L handlebar. The handlebars and stem (saddle and everything else too) will sway L-to-R and R-to-L through an arc of maybe 15-20 degrees. Practice this gentle toss-and-catch movement back and forth, catching the stem with your R hand and handlebar with your L.
You'll use the rocking-toward motion in mounts, and the rocking-away motion in dismounts.
NOTE: The best spot to grab the L handlebar is on the 'flat', between the stem and the beginning of the curve. This grip makes it easier to keep the front wheel straight as you push the bike to the R.
Mounting The Bike
1. Holding the bike by the handlebar and saddle, lift the rear wheel off the ground. Give the L pedal a gentle kick to rotate the pedals until they are at 3o'clock/9o'clock, the R pedal towards the front wheel and the L pedal towards the rear wheel. Place the rear wheel back on the ground, and re-grip the bike, with your L hand on the L handlebar and your R hand on the stem.
2. Keep that grip with your hands, and orient your R hip towards the top tube. There should be about 8-12 inches between your belly button and the handlebars.
3. Let your L hand go and let the bike sway away from you, guided by your R hand on the stem.
4. Toss the bike back towards you with your R hand, and at the same time raise your R leg up and swing it over the handlebars. As your leg passes over to the right, the bike passes under to the L.
5. At the instant that your L hand catches the bars, your R foot reaches the R pedal. (Clip in if you like, but it might be safer to save it until you've practiced dismounting.)
6. Place your weight on the R pedal, using it to lever your butt into the saddle. Push forward with the R pedal and catch the L pedal with your L foot.
7. Congratulations, you've just mounted your fixed! Time for a quick victory circuit. Now you need the next section, which is all about dismounting.
The Handlebar DismountThe basic handlebar dismount is the reverse of the handlebar mount. You straddle the bike, then pass it away from you while bringing your leg up, over, and toward you. Here are the steps in greater detail:
1. Riding the undersides of the pedals, come to a complete stop. Finish with the pedals in a comfortable 3o'clock/9o'clock position, the R pedal towards the front wheel and the L pedal towards the rear wheel. Step off the L pedal, then the R. You are now straddling the bike.
2. Grab the L handlebar with your L hand and allow the bike to lean slightly to the L.
3. Using a gentle thrust, pass the bike from the L to the R, so as to catch the stem in your R hand. At the same time, raise your R leg up, forwards and to the L, passing it over the handlebars and back down towards the L leg. The bike passes under to the R as your leg passes over to the L. (When I do this dismount, my left hand actually meets my leg over the bike and slaps the inside of my thigh.) Half a snap later, your R hand catches the stem and your R foot is back on the ground.
Kicking InYou may have experience kicking in to your pedals on a freewheel bike, but it's a bit different on a fixed. Clipping in is usually done while the pedals are in motion. First pedal, then clip in.
Some riders do the reverse. That is, they clip into one of the pedals while standing over the bike, and clip in to the other pedal as soon as their butt hits the saddle. This is the preferred style for track racers. Sometimes they even clip into both pedals before getting started - if they go from a standing start with a helper to hold them up. But while in learning mode, if you clip in before moving, you'll generate some comical, zero-MPH tip-overs. Even you will laugh!
It's best to kick in once you're in motion. Getting the wheels in motion before you kick in gives you scope for lots more moves.
If you're using clips and straps, stand your bike up and look at the pedals as the clips hang towards the ground. If your pedal was made for toeclips, then it may have a small flange or nib extending up and towards the front of the bike. This is to assist your kick into the pedals. You'll still be able to kick in even if your pedals don't have flanges, but it will be a bit harder to gain purchase.
Pedaling Technique
On a fixed gear, pedaling is everything. You can never STOP pedaling, so you might as well do it right! Pedaling supplies power, acceleration, deceleration, stopping, and balance. These functions are the basics of your fixed-gear riding, and to perform them well you need spin, power and smoothness.
The techniques we will use are Arc Drills, One-Legged Drills, Cadence Drills, and Hill Repeats. These are proven ways to increase your speed, power and smoothness.
What is Spin?Turning the pedals quickly. Some riders pedal over 200rpm (that's over 3 pedal revolutions per second), especially in the burst of a sprint or down a safe hill. Normal cadence, which is fine for everyday riding, is between 90 and 120rpm. If you encounter a safe downhill that you know doesn't have an obstacle or stop light at the bottom, then you can ride it out, which might require more than 120rpm. But even if your pedals never have to rotate at a great rate, the ability of your legs to push greater speeds will give you greater control at any rpm.
What is Power?Applying greater force to the pedals. This is a factor in all forms of cycling!
What is Smoothness?Applying force to the pedals at all points of their motion. This is a key factor both to spin and to the overall force that gets transferred to the pedals. Smooth pedaling is circular pedaling. During uneven, unsmooth pedaling, you mostly push down. That is, you apply force only in the downstroke. This means that the you push forward and down with the legs, and let the pedals carry the legs back and up to the top of the stroke. At higher cadences, this kind of unsmooth pedaling can be seen and felt. The body may rock from side to side, the torso bob back and forth, or the butt bounce up and down on the saddle.
During smooth pedaling, you transmit force to the pedal throughout its motion. With the aid of toeclips or clipless pedals, you can push backwards across the bottom of the pedal stroke and pull upwards at the back of the stroke. Extraneous motion is reduced, allowing more power to the pedals. This makes for greater overall efficiency and speed.
To Practice Use your bike in a safe area like an empty parking lot on a Sunday morning, or use rollers, or a stationary bike with a computer timer and cadence counter. Please remember to warm up and stretch! After these drills, even the first time, your pedaling will feel smoother and stronger, and your legs will feel much more control and "at one" with the pedals. You will definitely feel the difference!
On several of these exercises, it helps to find a cassette tape or CD of music that revs you up. Listen to it as you practice. I found several tapes of Cuban "charanga" music which inspired me, as its rhythm cadence is congruent with the cadence I'm shooting for.
Arc Drills
Arc drills are easier with your toeclips tight, or with clipless pedals. Their purpose is to develop greater smoothness and power. One of the key technical ingredients to good riding is a smooth, circular spin. This means applying a more even force to all angles around the 360-degree arc. Of course the degree of force applied to the pedals will not be perfectly equal at all angles, but we can improve the evenness of the stroke. Arc drills help. Proceed as follows:
1. Mentally divide the circle of your pedal stroke into quarters. For each foot, concentrate on the arc described by:
Arc 1: Forward and down--the main arc pedaled by most riders
Arc 2: Scraping across the bottom--as if you are scraping mud from your shoes by pushing down and back
Arc 3: Up in back--pulling up against the clips
Arc 4: Gliding across the top--transition between pulling up and pushing down
Arc drills are part concentration exercise. Really try to visualize each arc, and to feel it in your legs.
2. Practice pedaling, applying force only in Arc 2, letting your legs slightly relax in the other arcs. Of course the legs will still apply some pressure all around, but your effort should focus on bringing awareness and greater power to Arc 2.
3. Try to keep this up for the period of an entire song on your tape, or a 3-minute period. Rest for a few minutes.
4. Now ride applying force to Arc 3 for three minutes. Rest for a few minutes.
5. Repeat with Arc 4. Arc 1 doesn't need its own practice, because it's the arc normally used in pedaling.
6. You can extend from 3 minutes to 5 minutes. Also, if you find one of the arcs particularly spastic, uncoordinated and hard to apply force to, then give this arc more attention as you practice.
One legged drills
One legged drills are easier after Arc Drills, and with tight toeclips or clipless pedals. Their purpose is to achieve greater smoothness and power and evenness in movement from leg to leg.
Remove one foot from the clips, and pedal with the other foot. The lack of countering force will encourage the pedaling leg to describe a more perfect circle. Try to keep this up for the entire 3-minute period or throughout the song on your tape player. Then rest and try the other leg. Repeat 5 times for each leg.
Cadence drillsCadence drills improve speed and smoothness. A cadence counter is recommended - I've always found a stationary bike with computerized controls best for these, even if it's not a fixed!
1. Warm up for 10 minutes.
2. After warming up, pedal faster and faster. Try to hold a 90rpm cadence for one minute.
3. Move up to 120 for one minute.
4. Rest at a comfortable cadence for 30 seconds.
5. Accelerate slowly and smoothly to the greatest rpm that you can achieve. This acceleration between a comfortable pace and your top rpm should not be a burst, but should take 20-30 seconds to achieve. NOTE: If you feel your butt start to bounce up and down in the saddle, try concentrating on arc 3 or 4 or visualize pedaling in a perfect circle. If this doesn't work, lower your rpm until your motion is smoother, and then increase your rpm more gradually. If you can be smooth only at relatively low rpm, you need more arc drills!
6. Try to hold the top rpm for 10 seconds. If you have a cadence counter, make a mental note of the cadence.
7. Then try to control the deceleration smoothly back to a comfortable cadence. If you are on a freewheel machine, try to resist the impulse to relax into a coast after your exhausting high-rpm sprint.
8. Repeat this 5 times for this session, allowing several minutes between your accelerations to top-rpm. How long to wait? Until your breathing and hear-rate return to a normal rate for riding comfortably. As you work with this exercise, shoot for higher and higher top rpms for your 10 second plateau. If you'd like, try to hold that cadence for 15 or 20 seconds.
Hill Repeats
Hill repeats build power. Look for a route that takes you up a challenging hill, around, and back to your starting point. If you can't find such a route, then use any hill that lets you double back to descend. Depending on your overall fitness, repeat 5 or 10 times. Allow enough time between ascents so that your breathing and heart-rate return to normal (for normal riding patterns) before ascending again.
DownhillIn this section, you'll learn new ways to control the speed of your bike. While you're learning, use them in conjunction with your brake--and take it easy.
Fixers divide hills into two classes: those with obstructions, and those without. Obstructions can include traffic intersections, stop signs, obstacles such as oil, sand, logs or pot holes, blind spots, and other dangers.
Obstructed hills
On an obstructed hill, you must "control your roll." There are two main methods:
SlalomSlaloming is the system used by skiers and rollerbladers. As you carve your turns back and forth, concentrate on digging the front wheel into the ground. This easy method actually has remarkable slowing power, and you will find it convenient when you are tired. But it is advisable only if you have enough free space for the side-to-side slalom movement. You will need about the width of one traffic lane on the road. Rare, but it happens.
BackpedalingBackpedaling is the classic fixed gear braking technique. As you descend, you resist the forward motion of the pedals. One leg pushes back and down on the rear pedal as it rises up and forward, while the other leg pulls up on the front pedal as it rotates forward and down. If you're approaching a red light, a stop sign or cross traffic, you might end up going at about a walking pace.
Unobstructed hillsUnobstructed hills are rare. When you find one, use the opportunity to sprint! Get to know your top rpm and the hills that you can handle. Remember the cadence drills, which give you the ability to handle high rpm. If you find yourself 'spinning out' frequently, reconsider your choice of gear.
Slowing and StoppingSlowing
There are several ways to slow down. You can use the Slalom and Backpedal methods, covered in the previous section. You can also pseudocoast. This is where you release the forward pressure of your legs, letting them go "gumby." Without the application of forward or backward pressure, the natural weight of your legs will drag against the pedals and slow you down. Pseudocoasting is a good method to use when you have a lot of slowing distance, or when your legs are tired.
Stopping
There are several stopping methods.
Slowing to a stopThis is the one I use the most. It's smooth and deceptively simple. You keep on backpedalling, until eventually you drift to a stop! You can use this method either seated or standing, though standing will give you more leverage. It doesn't look impressive, since your body isn't visibly doing anything special. But it's the smoothest method and the one easiest on your knees. Your legs just learn what speed to use in order to cover a certain distance in a certain amount of time. Other stopping methods do look trick with their unexpected and abrupt movements, but they can create knee problems with overuse.
SkippingIn a skip stop you unweight the rear wheel, stop its rotation, then push it back onto the ground to scrub speed. A full stop may require several repetitions. Use the clips/clipless to pull your body off the saddle and up. Coordinate your movements so that by the time the wheel is unweighted--it may even come off the ground about an inch--the pedals are horizontal. At this point, kick back on the pedals to stop the motion of the wheel. This involves abruptly pulling up on the front pedal while you push down on the rear. You will probably find it easier to use the same foot forward as you use in trackstands. Coming to a full stop will take several pedal rotations, since your bike and body are still moving forward. As you let the pedals rotate forwards for the next kick, you can wait for one complete revolution, or one-half revolution if you're comfortable kicking back on the pedals with the feet positioned the opposite way. Repeat the process, keeping your butt off the saddle, until you come to a complete stop.
Skidding Skidding is like skipping, but without as much unweighting of the rear wheel. You stand on the pedals and wait until they almost reach the horizontal position that is comfortable for you. Then jerk with a backwards motion while unweighting the rear wheel, but do not let the wheel come off the ground. The tire will skid.
There are two slight variations on this technique. In the first, you skid repeatedly, letting the pedals rotate back into position, much as in the skip. In the other variation, you try to hold the skid until you come to a stop. It takes skill to unweight the rear wheel without bringing it up off the ground. This method is hard on the hub, the lockring, the back tire, and the knees--more of a showoff move or emergency fallback than an everyday staple. Nevertheless, urban bicycle messengers hold skidding competitions. With careful weighting, they can draw out the skid for hundreds of feet.
BalanceMore drills for the empty parking lot! Balance drills will open your balance and help you to learn trackstands (next section). Do them unclipped, or at least with the toestraps loose. You will find your balance stronger on one side than the other. When you do the following exercises, which side do you tip over on most of the time? That's your weaker side. You'll probably always have a weaker and a stronger side. But with practice, both sides will improve. Here are several things that should help that happen:
Ride as slowly as you canRide as slowly as you can without actually stopping. Racers in velodromes doing matched sprints will often do this. You will find yourself using the backpedaling pressure to control both speed and, to a lesser extent, balance.
Ride in very small circlesRide in small circles, both clockwise and counterclockwise. Sometimes the front wheel will seem like it's at right angles to the frame! Backpedaling pressure helps here too.
Hover before dismountingWhen you intend to stop, bring the pedals to a complete halt at the 3 o'clock - 9 o'clock positions, and stay upright as long as you can. Try it standing on the pedals as well as seated. Comfort with this will help a great deal staying in the pedals at traffic lights and at ultra-low speeds.
Ride with no handsYou can use markings on the parking lot, or even set up empty plastic water bottles as markers. Try different combinations:
any which direction across the lot large and small circles both directionsslaloms figure eights--an old skaters' warmup, which improves both left and right sides. TrackstandsTo trackstand is to balance on the bike while stationary. The pedals are at 3 and 9 o'clock and the front wheel is canted towards the front foot. Trackstands give you balance both left-to-right and front-to-back. Trackstands look cool. And they're useful. On the street, a trackstand at a red light keeps you on the bike, feet in the pedals, ready to hit it when the light turns green. But don't be distracted by the gawks of pedestrians who think they're seeing something impossible!
In the velodrome, trackstands help you win sprints. In matched sprint competitions, racers use trackstands to get in back of each other. "In back??!! Aren't they supposed to be in front to win the race?" Well, at the finish line, yes. But before that point, being behind of the other racer can be an advantage. Only the finish counts, even if the race takes a long time. So if you can force the other rider ahead of you, you'll be able to save energy riding in their draft, and then burst around the last quarter lap in a great sprint finish!
All the balance drills you've been doing will help with trackstands. Also, before you start practicing, it helps to choose a direction. For most riders, a trackstand is easier to learn on one side than the other. Trackstands can be assisted by a slight incline, such as the slope of the velodrome, or the rise in the crown of the road as you ride on the edge. My own riding, for example, is mostly along the right sides of New York City streets. I encounter inclines on the crown of the road which slope up and to the left. So I learned trackstanding first to the left. Riders in the UK or the velodrome might find it easier to learn trackstanding at first to the right.
Which foot first?Comfort is another important factor in choosing a direction. Which is your "leading foot"? The "lead foot" moves to the front when you ride a skateboard or wind up to kick a football. Some folks find it easier to learn trackstanding with the lead foot forward, even if the slope in the crown of the road would dictate otherwise. You can learn to trackstand on both sides, without canting the front wheel, without hands, and regardless of the slope. But, while learning, it makes sense to concentrate your efforts.
The Steps
1. Decide on a direction. Ask your body which foot likes to lead, try a few things and make a decision. The following steps assume the L foot forward direction, but you can swap 'em easily.
2. Find a place in your practice parking lot that has a gentle slope in the proper direction. The slope should be of just a few degrees, like the crown of a paved road.
3. Make sure you're not clipped in. Ride toward the slope. Find a line of approach that puts the slope uphill to your left.
4. Stop when your L foot is forward, R foot to the rear with the front wheel turned 30-45 degrees to the L. The pedal angle will be horizontal, or perhaps the front will be slightly above the rear pedal, approaching a 10 o'clock - 4 o'clock angle.
5. This step is easier to do standing on the pedals than seated. With the front foot, push gently uphill against the slope for a few seconds, then release the pressure and let yourself roll back down a few inches. Repeat this several times until you feel the back and forth trajectory becoming more solid and stable. You will notice that because the front wheel is at an angle, your motion is side-to-side as well as forward and backward. This movement in both dimensions is where your stability comes from.
NOTE: On flat ground, and partly on this gentle slope, the backward motion is accomplished by pressing down on the rear pedal. Freewheel riders supply the backwards resistance with their brake(s).
6. Concentrate on getting the forward and backward roll of the front wheel as slow and stable as possible. You shouldn't need more than 12 inches of trajectory. And the better your balance becomes, the shorter this distance can comfortably be. You can try it seated, but standing is easier at first. Looking into the middle distance is actually better for your balance. But at first, since you're still getting the angles and positions down, it's almost impossible to resist looking down at the front tire!
7. As you rock back and forth seeking a slow and stable motion, you will start to notice a point along the trajectory where you feel very well balanced. This is the "sweet spot," a place of peace and equilibrium. At first it feels like a very small and delicate place. But as you practice, it starts to open up and become easier to reach. You'll be able to stay longer and longer. This is your trackstand.
8. Play around. You can help open up the sweet spot by approaching the slope with your front pedal a bit higher or a bit lower. Try it seated. Try to hit it also on flat ground. Every once in a while, try the trackstand on the opposite side. You'll feel shaky and uncoordinated on that side, which will make you appreciate you nice it is to do on the side you're accustomed to!
Trackstand Tips
As you gain experience in landing in the sweet spot and losing it, you will see that you usually fall away from it in the same direction, either to the L or R. Use this information to compensate by bringing your body closer to the opposite side as you stand up and turn the front wheel.
It's easier to practice standing than seated, because you can move your bike underneath your body more easily.
As you rock back and forth and your bike moves, your pedals will need to be re-adjusted to find the 3-9 position.
You can also practice your trackstand by meditation and visualization. Put yourself into it while sitting on a couch, lying in bed, or even while walking down the street.
If you feel like you're losing balance and concentration but would still like to practice in the same session, then ride around for a bit. Try the balance drills. And after 10-15 minutes or so, give the trackstand another try.
If you manage to hold your trackstand for an uncommonly long time, let that be it for a while. Don't push it for an hour or so. Go do some other riding. Let this one incubate and settle into your body. Next time you give it a try, your body will find it a bit more comfortable!
Dance skaters say, "There are no mistakes, only moves." You can use this attitude. If you feel yourself losing the trackstand, make a stylish move out of it. Right before wiping out, whip your front wheel in a direction that will keep you on the bike, and ride coolly away. "Yeah, I planned that."
Every time you're out, do one or two last trackstands right before you get off the bike for the day. This is what will imprint in your body until next time out.
Emergency StopsWhat if your brakes fail, your chain breaks or pops off, you get something caught in the chain, or your pedals get out of control on a downhill? What can you do? There are several techniques. They aren't pleasant to use, but they are better than the alternative!
Lean the bike overTry to remove your feet from the clips and lean the bike to the side. Plant your foot on the ground and do a one-half Fred Flintstone. One associate of mine got his shoelace caught in the chainring and had to lean the bike over to where his knee scraped the ground. He stopped finally, and learned to tuck the laces firmly into his shoes!
Skid to a powerslideThis is a prolonged skid where you also whip the tail of the bike around so that the bike faces sideways. If your forward foot is the L foot, you'll probably find it more comfortable to whip the rear of the bike to the R, and vice versa. The powerslide redirects your forward motion sideways and brings you to a quicker halt. It's the same movement as you might have done as a kid with your dirt bike, MTB or BMX. You might have even seen skateboarders doing brakeless powerslides.
Ride into the shoulder of the roadThis will soften the blow. You'll wipe out into dirt or bushes, or even something harder. But it's probably still better than riding into a busy intersection at high speed. If there's a curb at the shoulder of the road, then you might have to bunnyhop the bike. To do this, do a wheelie to get the front wheel up and over, then immediately, unweight the rear wheel and pull up as explained in the section on Skip and Skid stops.
Foot into the seatstaysYou might have done this on your bike as a kid. Using your dominant foot or your more limber leg, unclip and bring the foot up and back. Plant it in the gap where the rear wheel goes through the seatstays. Ideally, it will be your shoe and not your ankle that'll lodge into the space, providing a brake to the rear tire.
Glove against the front wheelUse this one with caution, since it can make you flip forwards. But people have done this successfully. Press the palm of your gloved hand onto the tire in front of the fork (not in back of it!) and press down or squeeze with your hand. Try not to lean too far forward.
If your chain breaks or pops off...Unclip from the R pedal, swing your leg over the saddle and drag the foot on the L side of the bike like kids do. Or take your butt off the saddle, sit on the top tube with one haunch, and do a Fred Flintstone with the other foot. Or use a combination, a one-footed Fred while leaning the bike to the side.
.JPG)
.JPG)
.JPG)